FancyToys是一个工具集,里边包含了Nursery。
UWP 大佬
项目结构
FancyToys
ContentDialog工具类
System.Exception:“某个异步操作没有正常启动。 Only a single ContentDialog can be open at any time.”
public static async void Show (string title ContentDialog dialog = new ContentDialog() { Title = title, PrimaryButtonText = "好的" , CloseButtonText = "Cancel" , DefaultButton = ContentDialogButton.Primary, }; await dialog.ShowAsync(); }
Utils.cs StackOverFlow public class DialogUtil { public static ContentDialog ActiveDialog; static TaskCompletionSource <bool > DialogAwaiternew TaskCompletionSource<bool >(); public static async void CreateContentDialog (ContentDialog Dialog, bool awaitPreviousDialog )await CreateDialog(Dialog, awaitPreviousDialog); } public static async Task CreateContentDialogAsync (ContentDialog Dialog, bool awaitPreviousDialog )await CreateDialog(Dialog, awaitPreviousDialog); } private static void ActiveDialog_Closed (ContentDialog sender, ContentDialogClosedEventArgs args )true ); } public static async void Info (string text await DialogUtil.CreateContentDialogAsync(new ContentDialog { Title = "Info" , Content = new TextBlock { Text = text, TextWrapping = TextWrapping.Wrap }, PrimaryButtonText = "好的" }, awaitPreviousDialog: true ); } static async Task CreateDialog (ContentDialog Dialog, bool awaitPreviousDialog ) if (ActiveDialog != null ) { if (awaitPreviousDialog) { await DialogAwaiter.Task; DialogAwaiter = new TaskCompletionSource<bool >(); } else ActiveDialog.Hide(); } ActiveDialog = Dialog; ActiveDialog.Closed += ActiveDialog_Closed; await ActiveDialog.ShowAsync(); ActiveDialog.Closed -= ActiveDialog_Closed; } }
开启受限功能
启动其他应用、窗口关闭事件的处理都需要开启受限功能。
添加引用
在项目-引用中添加Windows Desktop Extensions for the UWP,如果找不到的话请到 C:\Program Files (x86)\Windows Kits\10\UnionMetadata\10.0.18362.0\中添加Windows.winmd
修改配置
在Package.appxmanifest中修改以下代码。runFullTrust:启动应用程序;confirmAppClose:打开修改 SystemNavigationManagerPreview.GetForCurrentView().CloseRequested的权限以处理该事件。
Package.appxmanifest <Package xmlns="http://schemas.microsoft.com/appx/manifest/foundation/windows10" xmlns:mp="http://schemas.microsoft.com/appx/2014/phone/manifest" xmlns:uap="http://schemas.microsoft.com/appx/manifest/uap/windows10" xmlns:rescap="http://schemas.microsoft.com/appx/manifest/foundation/windows10/restrictedcapabilities" xmlns:desktop="http://schemas.microsoft.com/appx/manifest/desktop/windows10" IgnorableNamespaces="uap mp rescap"> <Application > <Applications > <Extensions > <desktop:Extension Category ="windows.fullTrustProcess" Executable ="tools\FancyServer.exe" > </desktop:Extension > </Extensions > </Application > </Applications > <Capabilities > <Capability Name ="internetClient" /> <rescap:Capability Name ="runFullTrust" /> <rescap:Capability Name ="confirmAppClose" /> </Capabilities >
App.xaml.cs // public static IAsyncAction LaunchFullTrustProcessForCurrentAppAsync(); // public static IAsyncAction LaunchFullTrustProcessForCurrentAppAsync(string parameterGroupId); FullTrustProcessLauncher.LaunchFullTrustProcessForCurrentAppAsync();
参考
UWP: how to start an exe file that is located in specific directory? App close confirmation in UWP
UWP与win32通信
UWP与win32的通信方式有AppService、套接字、管道、RPC、共享内存等,管道比较合适同主机进程间的通信。 作为前端的FancyToys发出请求,FancyServer作为后端处理请求并返回结果。UWP与win32在管道的创建时与 普通管道略有不同,在win32是fullTrustProcess时:
UWP使用的管道名需要遵循\\.\pipe\LOCAL\原则(在多次尝试之后使用:@"LOCAL\NurseryPipe") 2.win32使用的管道名较为复杂:$"Sessions\\{Process.GetCurrentProcess().SessionId}\\AppContainerNamedObjects\\{ApplicationData.Current.LocalSettings.Values["PackageSid"]}\\NurseryPipe"
win32在创建管道时需要加入权限验证,否则会报System.UnauthorizedAccessException:“Access to the path is denied.”异常。
FancyServer private static void PipeServerThread ( server = new NamedPipeServerStream(pipeName, PipeDirection.InOut, 1 , PipeTransmissionMode.Message, PipeOptions.Asynchronous, 1024 , 1024 , null , HandleInheritability.None, PipeAccessRights.ChangePermissions); PipeSecurity ps = server.GetAccessControl(); PipeAccessRule clientRule = new PipeAccessRule( new SecurityIdentifier("S-1-15-2-2486220046-417657740-3976339917-3362139460-2716223609-868283920-565007427" ), PipeAccessRights.ReadWrite, AccessControlType.Allow); PipeAccessRule ownerRule = new PipeAccessRule( WindowsIdentity.GetCurrent().Owner, PipeAccessRights.FullControl, AccessControlType.Allow); ps.AddAccessRule(clientRule); ps.AddAccessRule(ownerRule); server.SetAccessControl(ps); Console.WriteLine("Waiting for connection." ); server.WaitForConnection(); LoggingManager.Info($"Connection established: {pipeName} " ); reader = new StreamReader(server); writer = new StreamWriter(server); while (true ) { if (!server.IsConnected) { server.Disconnect(); Console.WriteLine("Disconnected from FancyToys, waiting for its reconnection." ); server.WaitForConnection(); LoggingManager.Info("FancyToys reconnected" ); } string message = reader.ReadLine(); MessageManager.Receive(message); } }
FancyToys private void PipeClientThread ( client = new NamedPipeClientStream("." , @"LOCAL\NurseryPipe" , PipeDirection.InOut, PipeOptions.Asynchronous); client.Connect(); reader = new StreamReader(client); writer = new StreamWriter(client); while (true ) { if (!client.IsConnected) { client.Connect(); Log("Conection re-established." ); } string message = reader.ReadLine(); Dispatcher.RunAsync(CoreDispatcherPriority.Normal, () => Monitor.Text += $"Received: {message} {Environment.NewLine} " ).AsTask().Wait(); } }
参考
NamedPipesSample IPC: UWP C# pipe client fails on connect C++ server UWP使用命名管道与桌面程序通信 (C#)
DataGrid的更新
这 不可能 是最后一个困扰人的问题
可拖拽区域
和WPF不太一样。与之相比较,出现了两个小问题: 1. 一开始没有实现DragOver,误以为不能拖拽,实际上可能已经OK了 2. Rectangle没有Fill属性的话不能拖拽,但可以设置Opacity解决。添加了颜色之后甚至比之前好看。
private async void DropArea_Drop (object sender, DragEventArgs e var defer = e.GetDeferral(); try { DataPackageView dpv = e.DataView; if (dpv.Contains(StandardDataFormats.StorageItems)) { List<StorageFile> fileList = new List<StorageFile>(); var files = await dpv.GetStorageItemsAsync(); foreach (var item in files) { DialogUtil.Info(item.Name); } } } finally { defer.Complete(); } } private void DropArea_DragOver (object sender, DragEventArgs e e.AcceptedOperation = DataPackageOperation.Copy; e.DragUIOverride.Caption = "拖放以添加" ; e.DragUIOverride.IsCaptionVisible = true ; e.DragUIOverride.IsContentVisible = true ; e.DragUIOverride.IsGlyphVisible = true ; e.Handled = true ; }
参考
UWP拖拽文件 UWP Soundboard(添加拖拽)
xaml设置控件样式
如果不能直接设置样式的话,试试这个
<ListBox x:Name ="ProcessListBox" Background ="{ThemeResource BackgroundAcrylicBrush}" ItemsSource ="{Binding SwitchList}" > <ListBox.ItemContainerStyle > <Style TargetType ="ListBoxItem" > <Setter Property ="Height" Value ="40" /> <Setter Property ="Padding" Value ="10,0,0,0" /> </Style > </ListBox.ItemContainerStyle > </ListBox >
参考
UWP Change ListView Item Height How to dynamically change the height of ListBoxItem UWP?
C#修改控件样式属性
private void SetSmallFlyoutItem_Click (object sender, RoutedEventArgs e ProcessListBox.ItemContainerStyle = GetStyle(HeightProperty, "32" ); } private Style GetStyle (DependencyProperty property, object value ) Style style = new Style { TargetType = typeof (ListBoxItem) }; style.Setters.Add(new Setter(property, value )); style.Setters.Add(new Setter(PaddingProperty, "10,0,0,0" )); ProcessListBox.ItemContainerStyle = style; return style; }
在xaml设置的初始属性会被该方法覆盖,例如ListBoxItem的padding又恢复默认,需要重新设置。
参考
win10 uwp 如何修改 Flyout 的宽度或高度 。
ContentDialog输入框
来自 这里
解决方案资源管理器可以添加内容对话框(ContentDialog)页面!
可能是因为对话框不能直接返回输入值,这里用了公开变量的方法。isSaved用于表明是否保存输入,inputArgs用于保存输入值。关闭或取消对话框之后,就可以根据上述两个变量进行相应的操作。感谢提出这个方法的作者。
public bool isSaved = false ;public string inputArgs = "" ;private void ContentDialog_PrimaryButtonClick (ContentDialog sender, ContentDialogButtonClickEventArgs args ) inputArgs = DialogInput.Text; isSaved = true ; Hide(); } private void ContentDialog_SecondaryButtonClick (ContentDialog sender, ContentDialogButtonClickEventArgs args ) isSaved = false ; Hide(); }
这里还有另一个从StackOverflow找到的Dialog生成方法,链接已不可考……
public class DialogUtil { public static ContentDialog ActiveDialog; static TaskCompletionSource <bool > DialogAwaiternew TaskCompletionSource<bool >(); public static async void CreateContentDialog (ContentDialog Dialog, bool awaitPreviousDialog )await CreateDialog(Dialog, awaitPreviousDialog); } public static async Task CreateContentDialogAsync (ContentDialog Dialog, bool awaitPreviousDialog )await CreateDialog(Dialog, awaitPreviousDialog); } private static void ActiveDialog_Closed (ContentDialog sender, ContentDialogClosedEventArgs args )true ); } public static async void Info (string text await DialogUtil.CreateContentDialogAsync(new ContentDialog { Title = "Info" , Content = new TextBlock { Text = text, TextWrapping = TextWrapping.Wrap }, PrimaryButtonText = "好的" }, awaitPreviousDialog: true ); } static async Task CreateDialog (ContentDialog Dialog, bool awaitPreviousDialog ) if (ActiveDialog != null ) { if (awaitPreviousDialog) { await DialogAwaiter.Task; DialogAwaiter = new TaskCompletionSource<bool >(); } else ActiveDialog.Hide(); } ActiveDialog = Dialog; ActiveDialog.Closed += ActiveDialog_Closed; await ActiveDialog.ShowAsync(); ActiveDialog.Closed -= ActiveDialog_Closed; } } `` ## 文件读写 UWP文件读写功能又被限制,一般是只能读写App本地文件夹,还可以请求诸如图片库、视频库等库文件夹,要是想要访问任意文件的话,就需要更改`Package.appxmanifest`了。因为本App需要序列化文件列表及其参数,恰好要用到本地文件读写。具体操作的话可以查看VS的代码提示或 [文档](https: ``` cs private static StorageFolder localFolder = ApplicationData.Current.LocalFolder;StorageFile file = await localFolder.CreateFileAsync(jsonFile, CreationCollisionOption.OpenIfExists); string JSONContent = await FileIO.ReadTextAsync(file);string configJson = JsonConvert.SerializeObject(dj);StorageFile file = await localFolder.CreateFileAsync(jsonFile, CreationCollisionOption.OpenIfExists); await FileIO.WriteTextAsync(file, configJson);
终止线程
调用thread.Abort()可能不会立即终止线程,甚至可能永远不会终止。 下方代码就出现了此问题,可以将serverRun置为false以终止该线程。
serverThread = new Thread(new ThreadStart(PipeServerThread)); serverThread.Start(); private static void PipeServerThread ( while (serverRun) { if (!server.IsConnected) { server.Disconnect(); LoggingManager.Info("Disconnected from FancyToys, waiting for its reconnection." ); server.WaitForConnection(); LoggingManager.Info("FancyToys reconnected" ); } string message = reader.ReadLine(); if (!string .IsNullOrEmpty(message)) { MessageManager.Receive(message); } } }
更换主题
参考
LocalSettings添加enum类型的值
System.ArgumentException: '参数错误。 Error trying to write application data container value'
解决方式是在写入LocalSettings前和读取LocalSettings之后进行一个string和enum的转换
public LogType LogLevel{ set { ApplicationData.Current.LocalSettings.Values["LogLevel" ] = value .ToString(); } get { if (ApplicationData.Current.LocalSettings.Values.TryGetValue("LogLevel" , out object val)) { return ParseEnum<LogType>(val as string ); } _ = MessageDialog.Error("Error while setting Log Level" , "Setting not found." ); return LogType.Info; } } T ParseEnum <T >(object value if (value == null ) { return default ; } return (T)Enum.Parse(typeof (T), value .ToString()); }
How to save an enumeration into ApplicationData.Current.LocalSettings
xaml值绑定
绑定模式: + OneTime: 绑定创建时更新(Page 或 User Control 的 Loading 事件中初始化,只更新一次) + OneWay: 绑定源更改,绑定目标随之更新 + TwoWay: 源和目标双向更新
对于OneWay模式,当源更改时并不能及时更新,源需要实现INotifyPropertyChanged接口, 或者直接调用this.Bindings.Update()以获取更新。
public sealed partial class ServerPage : Page , INotifyPropertyChanged { private double logPanelOpacity = SettingsClerk.Clerk.STLogPanelOpacity; public double LogPanelOpacity { get => logPanelOpacity; set { logPanelOpacity = value ; RaisePropertyChanged("LogPanelOpacity" ); } } public event PropertyChangedEventHandler PropertyChanged; private void RaisePropertyChanged (string name PropertyChanged?.Invoke(this , new PropertyChangedEventArgs(name)); } SettingsClerk.Clerk.OpacityChanged += () => { LogPanelOpacity = SettingsClerk.Clerk.STLogPanelOpacity; }; }
参考
UWP: 掌握编译型绑定 x:Bind Difference between Binding and x:Bind With compiled bindings (x:bind), why do I have to call Bindings.Update()? BindingMode Enum INotifyPropertyChanged.PropertyChanged Event
属性的封装与"Access violation"
程序“[xxxxx] FancyToys.exe”已退出,返回值为 -1073741819 (0xc0000005) 'Access violation'。
对C#语法不甚了解,才出现了这个“闹剧”。使用下方代码对Page赋值的时候,出现该错误,封装私有字段后,问题解决。
public static SettingsPage Page{ private set => Page = value ; get => Page; } public static SettingsPage Page { private set ; get ; }
DataGrid、ObservableCollection 排序
DataGrid的排序 要设置CanUserSortColumns="True" Sorting="ProcessGrid_Sorting"属性, 分别对待排序的列进行处理。如果某列未排序或者是降序,就要变为升序,反之为降序。排序后设置Header的箭头 (Ascending/Descending)并清除其他列的排序箭头 将ObservableCollection转为List,排序后再装入到原来的ObservableCollection。
private void ProcessGrid_Sorting (object sender, DataGridColumnEventArgs e switch (e.Column.Header.ToString()) { case "Process" : if (e.Column.SortDirection == null || e.Column.SortDirection == DataGridSortDirection.Descending) { SortData((x, y) => x.Process.CompareTo(y.Process)); e.Column.SortDirection = DataGridSortDirection.Ascending; } else { SortData((x, y) => -x.Process.CompareTo(y.Process)); e.Column.SortDirection = DataGridSortDirection.Descending; } break ; } foreach (var dc in ProcessGrid.Columns) { if (dc.Header.ToString() != e.Column.Header.ToString()) { dc.SortDirection = null ; } } } private void SortData (Comparison<ProcessInformation> comparison ) var sortableList = new List<ProcessInformation>(InfoList); sortableList.Sort(comparison); InfoList.Clear(); foreach (var pi in sortableList) { InfoList.Add(pi); } }
参考
Sort ObservableCollection through C#
FancyServer
主要工作和项目结构
前后端通过管道通信……
            stateDiagram-v2
            PipeBridge --> MessageManager: Message
MessageManager --> PipeBridge: Message

MessageManager --> ActionManager: Action
ActionManager --> NoForm: action
NoForm --> ActionManager: action
NoForm --> LoggingManager: log
ActionManager --> MessageManager: Action
ActionManager --> LoggingManager: log

MessageManager --> NurseryManager: Nursery
NurseryManager --> ProcessManager: Process
NurseryManager --> LoggingManager: log
ProcessManager --> NurseryManager: Information
ProcessManager --> LoggingManager: log
NurseryManager --> MessageManager: Nursery

MessageManager --> SettingManager: Setting
SettingManager --> ActionManager: settings
SettingManager --> MessageManager: Setting
SettingManager --> LoggingManager: settings, log

LoggingManager --> MessageManager: Logging
笔记
为UWP和win32建立管道
switch 判断对象 Type
C#自v7.0支持模式匹配,否则需要一连串的if else 用 is 关键字判断传入类型。此外, typeof关键字、object.GetType()也可以对对象进行类型判断,但不如原生语法灵活。 在StackOverflow 中介绍了其他的类型判断方式。
switch判断传入对象类型 模式匹配 highlight public static void Send (object sdu MessageStruct? pdu = null ; switch (sdu) { case ActionStruct ass: pdu = PDU(MessageType.action, JsonConvert.SerializeObject(ass)); break ; case LoggingStruct ls: pdu = PDU(MessageType.logging, JsonConvert.SerializeObject(ls)); break ; case NurseryStruct ns: pdu = PDU(MessageType.nursery, JsonConvert.SerializeObject(ns)); break ; case SettingStruct ss: pdu = PDU(MessageType.setting, JsonConvert.SerializeObject(ss)); break ; default : LoggingManager.Error("Invalid message SDU type" ); break ; } if (pdu != null ) { PipeMessenger.Post(JsonConvert.SerializeObject(pdu)); } }
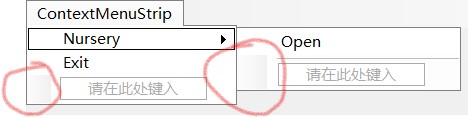
修改托盘图标菜单样式
Stackoverflow
注意阴影
大多软件的托盘图标菜单都是纯白的,ContextMenuStrip的默认样式与之相比有点过时,这里需要修改 MenuItem的BackColor属性,但是ToolMenuStripSeparator的BackColor属性在渲染的时候被忽略(或覆盖)了, 需要在separator的Paint事件上加点料:
private void mnuToolStripSeparator_Custom_Paint (Object sender, PaintEventArgs e ) ToolStripSeparator sep = (ToolStripSeparator)sender; e.Graphics.FillRectangle(new SolidBrush(CUSTOM_COLOR_BACKGROUND), 0 , 0 , sep.Width, sep.Height); e.Graphics.DrawLine(new Pen(CUSTOM_COLOR_FOREGROUND), 30 , sep.Height / 2 , sep.Width - 4 , sep.Height / 2 ); }
遍历 ToolStripMenuItem.DropDownItems 时要区分 ToolStripSeparator 和 ToolStripDropDownItem 类型
            stateDiagram-v2
            ContextMenuStrip --> ToolStripMenuItem
ToolStripMenuItem --> DropDownItems(ToolStripItemCollection)
state DropDownItems(ToolStripItemCollection) {
    ToolStripItem --> ToolStripSeparator
    ToolStripItem --> ToolStripDropDownItem
}
Obsolete notes
父进程退出后(子进程不退出)端口不释放
这个问题出自原来的“NurseryLauncher”,现在提供win32服务的是"FancyServer"。与前者相比, 后者结构更加清晰,功能也更加完善。
NurseryLauncher.exe(绑定626端口)启动 puppet.exe(80端口)后,再手动关闭NurseryLauncher.exe, 从下图可以看出,根据端口查看进程,有pid存在,但是没有该进程。查子进程puppet.exe一切正常。这样导致的问题是:下次NurseryLauncher.exe因为端口占用不能正常启动